Help docs
Select a topic from the list.
API
how-to-trigger-a-sendAdmin
a-list-of-user-access-permissionshow-to-add-a-group
how-to-add-a-user
how-to-change-a-group-logo
how-to-edit-user-permissions
how-to-mass-manage-users
Campaigns
how-to-create-a-campaignhow-to-edit-campaign-settings
Code Editor
code-editor-overviewhow-to-include-a-view-in-browser-link
how-to-include-an-unsubscribe-link
how-to-include-dynamic-content-in-your-email
how-to-make-html-elements-editable-data-see
how-to-personalize-by-first-name
how-to-use-javascript-in-your-email
improve-reporting-with-linknames
key-board-short-cuts
ESP
how-to-add-ses-as-your-esphow-to-add-sparkpost-as-your-esp
Images
how-to-move-imageshow-to-upload-images
Reporting
how-to-export-a-csvhow-to-generate-a-pdf
overview-serious-email-analytics
Sending
how-to-send-overviewSettings
how-to-add-a-from-addresshow-to-change-owner-of-a-from-address
how-to-edit-your-account-settings
how-to-share-a-from-address
Subscribers
how-to-assign-subscriber-lists-to-a-campaignhow-to-clean-a-subscriber-list
how-to-edit-a-subscriber
how-to-export-a-csv
how-to-import-subscribers
how-to-resubscribe-a-subscriber
how-to-share-a-list-across-groups
how-to-share-a-list-with-other-users
Templates
how-to-access-preview-linkshow-to-clone-a-template
how-to-mass-clone-a-template
how-to-search-and-replace-in-multiple-templates
how-to-set-up-a-test-send
how-to-zip-and-export-templates
template-manager-overview
Users
how-to-mass-manage-usersVisual Editor
visual-editor-overviewAdmin: how to add a user
If your account allows for additional users, it's easy to add them. You have very granular control over what the user's experience will be like. You may want some of your users to just be able to send an email and not touch anything else. Or, you may want your accountant to just see subscription related information. You may want a user to access one Group, but not another. It's up to you.
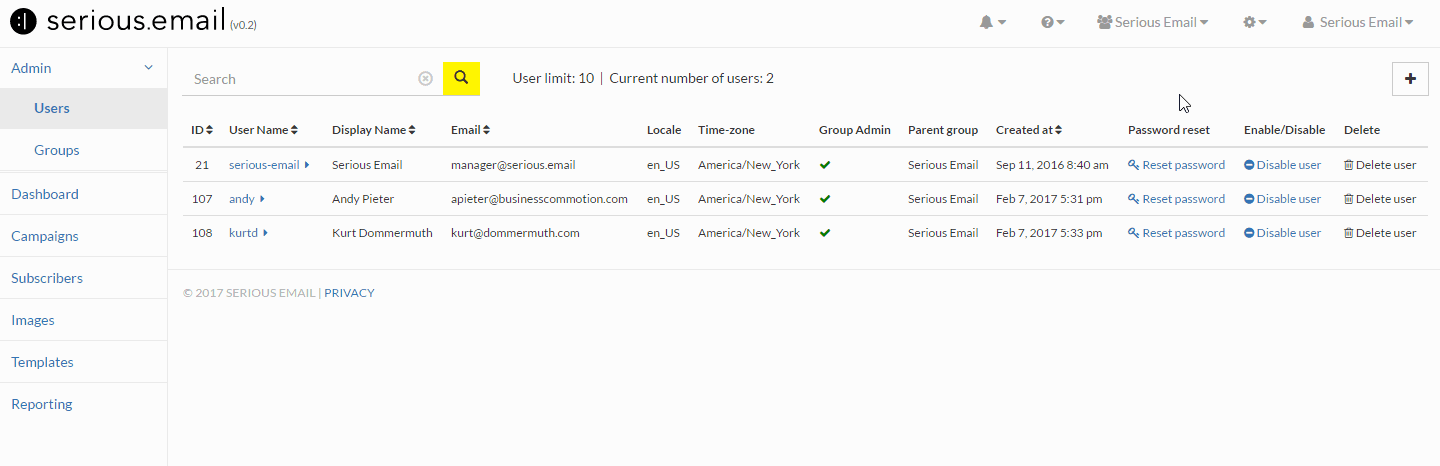
Go to Admin->Users
This is located here: UsersClick the
This will open a modal window. Note: you won't see this button if your account does not include additional users.Input User Information
In addition to basic information, you can control the experience of the user you are creating by setting their Access Settings. Click the following link for more information: User Access Permsions.Enter User Name
The User name may be used for login purposes. The user's email address may also be used in the login process.Enter Display Name
The Display name is used by the UI.Enter Email
The Email is used by the UI for login and to share information via email.Enter New user
Currently not required.Enter Locale
The Locale may impact event dates and times - such as send times.Enter Groups
If your account allows for multiple groups you can choose to give the user access to them (or not). The Primary Group is, by default set to the current Group you are in, but can be changed to another Group the user belongs to. The Primary Group is the Group the user first sees when they first login.Select Send Invitation
If you check this box, the user will get an email notification that their account has been created. It will include a link to create a password and login. Optionally, you can generate this same email later by clicking "Reset password".